Create an Ovoid-Curve Ramp
An ovoid-curve ramp is useful when an interchange ramp needs to tighten gradually within limited space. In this example, vehicles enter a larger R=90m arc, pass through a transition curve, then enter a smaller R=60m arc before joining the mainline entrance.
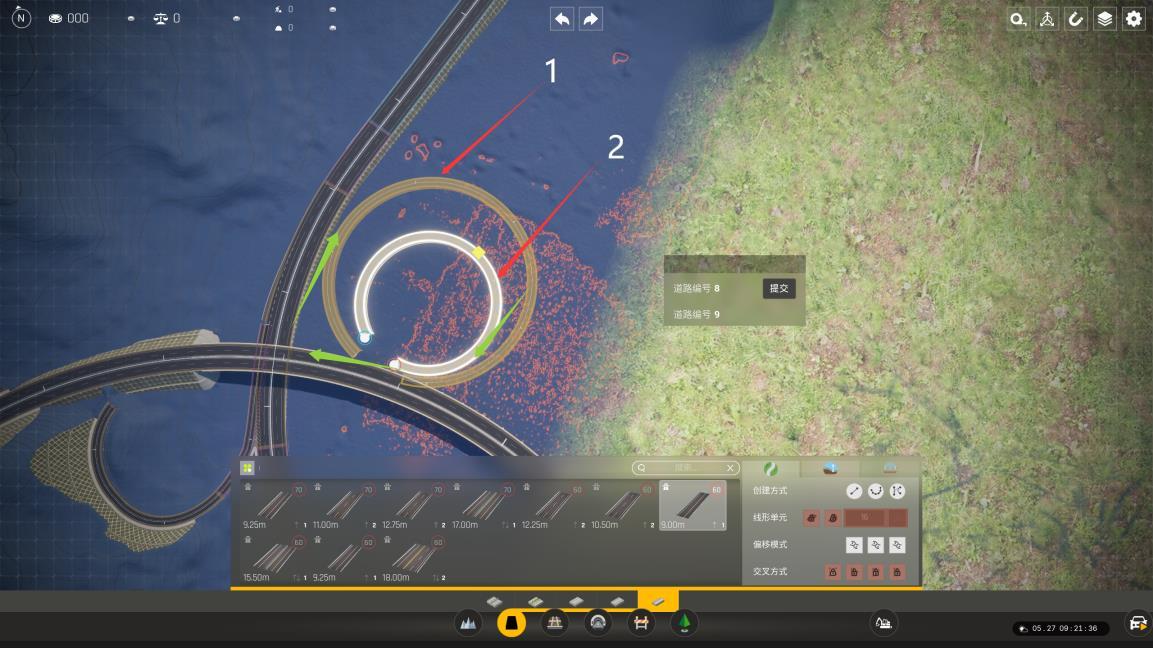
A transition curve consumes length from the adjacent circular curves. Leave enough arc length before connecting. If the connection is too short, too sharp, or unstable, adjust the circle positions first.
| Element | Example value | Purpose |
|---|---|---|
| Large circular curve | R = 90m | The gentler entry curve after the vehicle leaves the mainline. |
| Middle transition curve | Generated by the system | Changes curvature smoothly from 1/90 to 1/60. |
| Small circular curve | R = 60m | The tighter turning section before the mainline entrance. |
| Mainline connection | Generated with the ramp-to-mainline connection workflow | Connects the ovoid ramp into the target mainline entrance. |
Step 1: Place the large and small arcs. Create the R=90m arc first, then the R=60m arc. The large arc should form a same-direction compound relationship around the small arc, while the control elements remain separated.
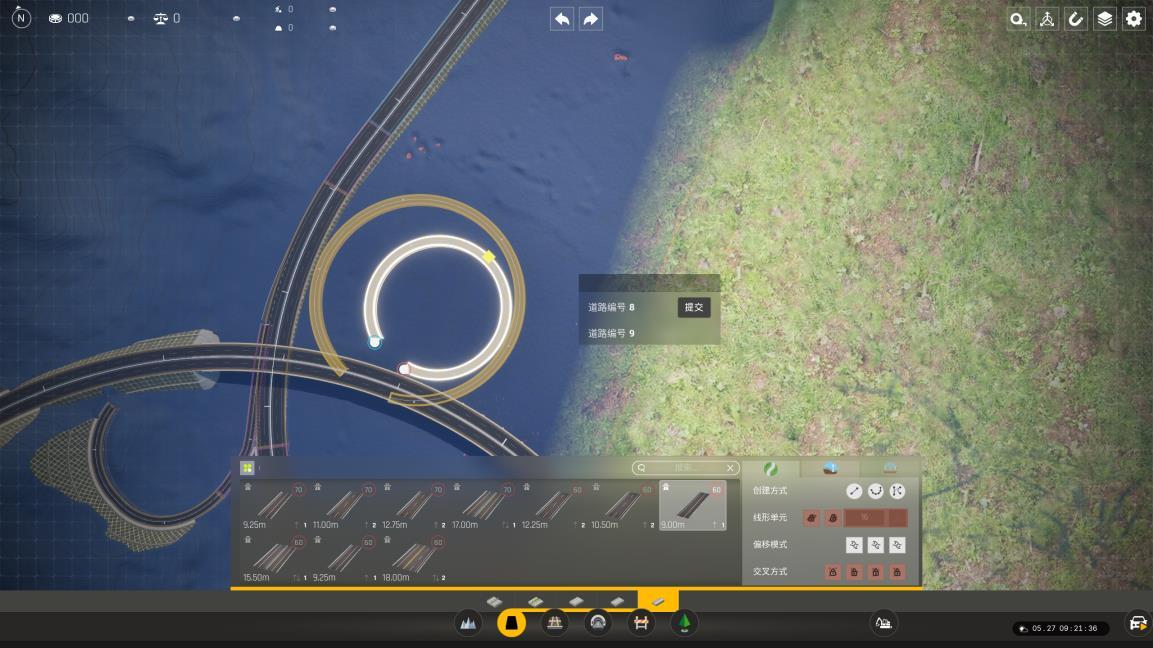
Step 2: Check connection space. The large arc should remain separated from the lower mainline, and the small arc should remain separated from the upper mainline. Keep the arcs close enough for a transition curve, but never intersecting or overlapping.
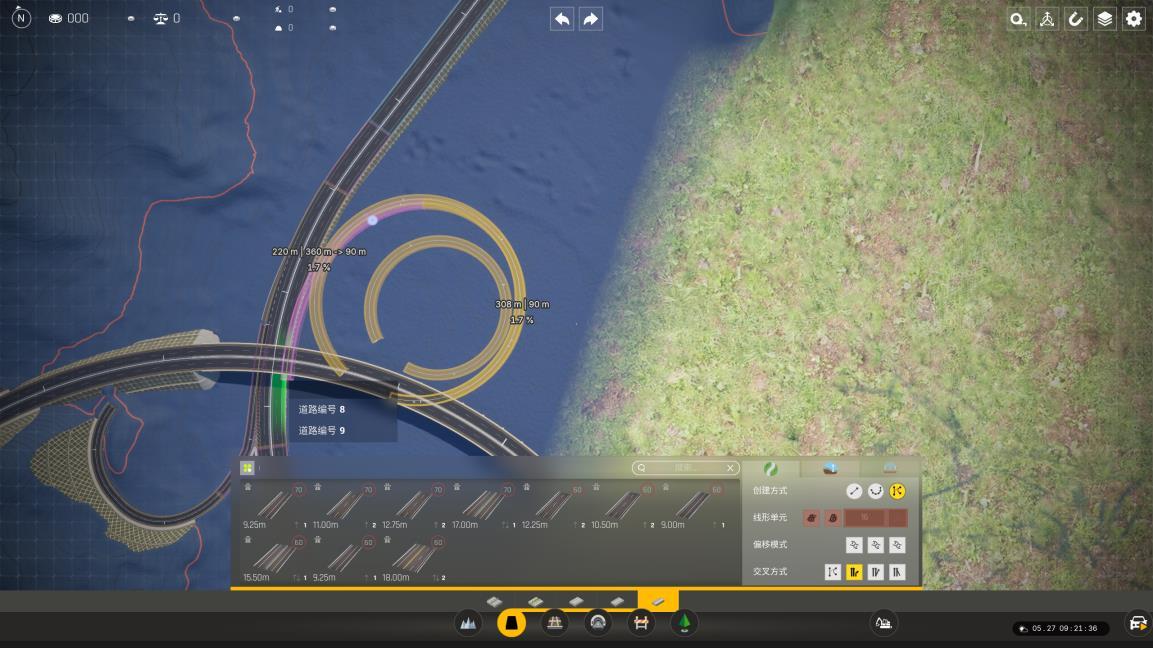
Step 3: Adjust circle positions when the connection is poor. If the preview connection is too short, too sharp, or poorly aimed at the later mainline entrance, move the circular curves before generating the final connection.
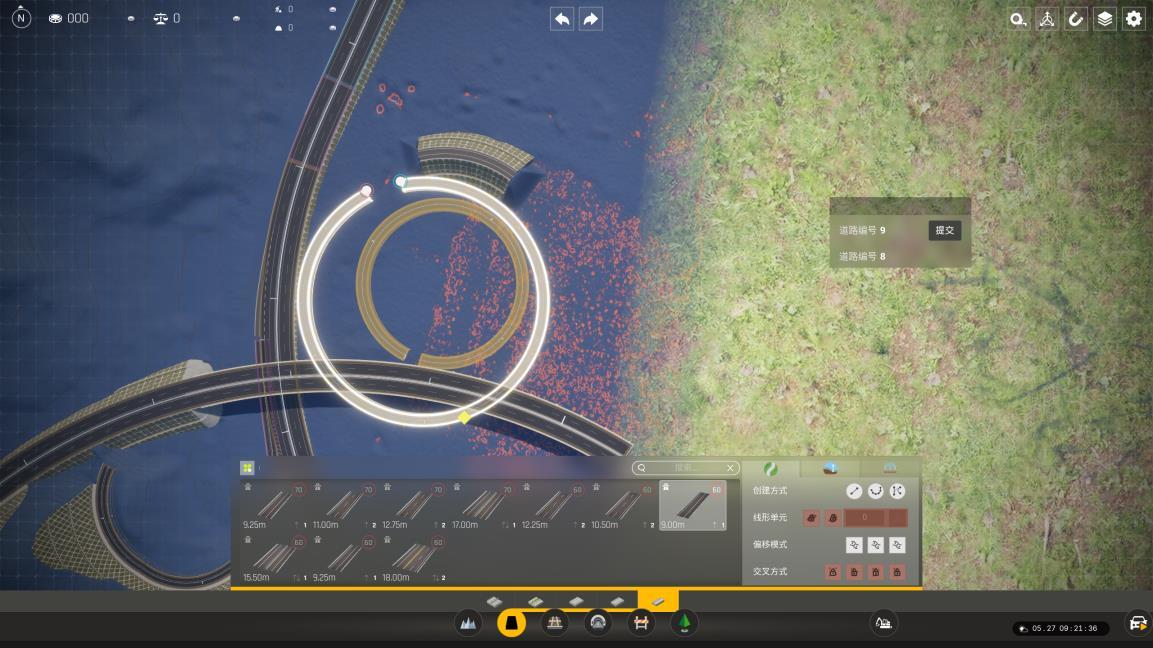
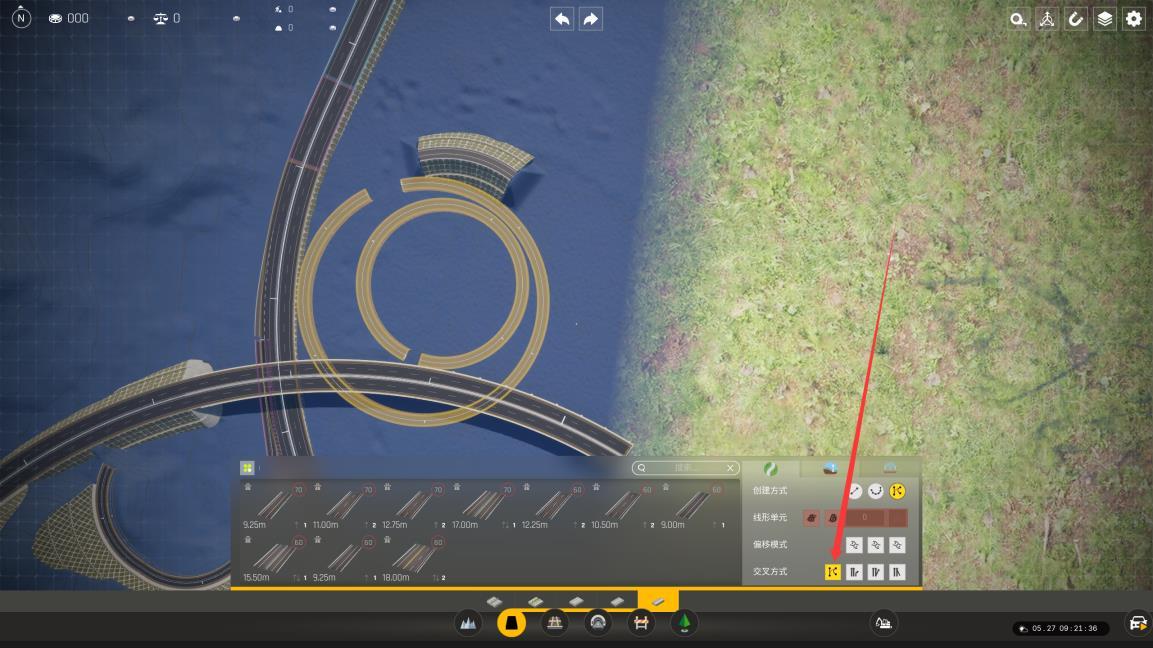
Step 4: Connect the two arcs with a transition curve. Select the transition-curve connection tool, then select the R=90m arc and the R=60m arc in order. The generated middle segment is the core of the ovoid curve.
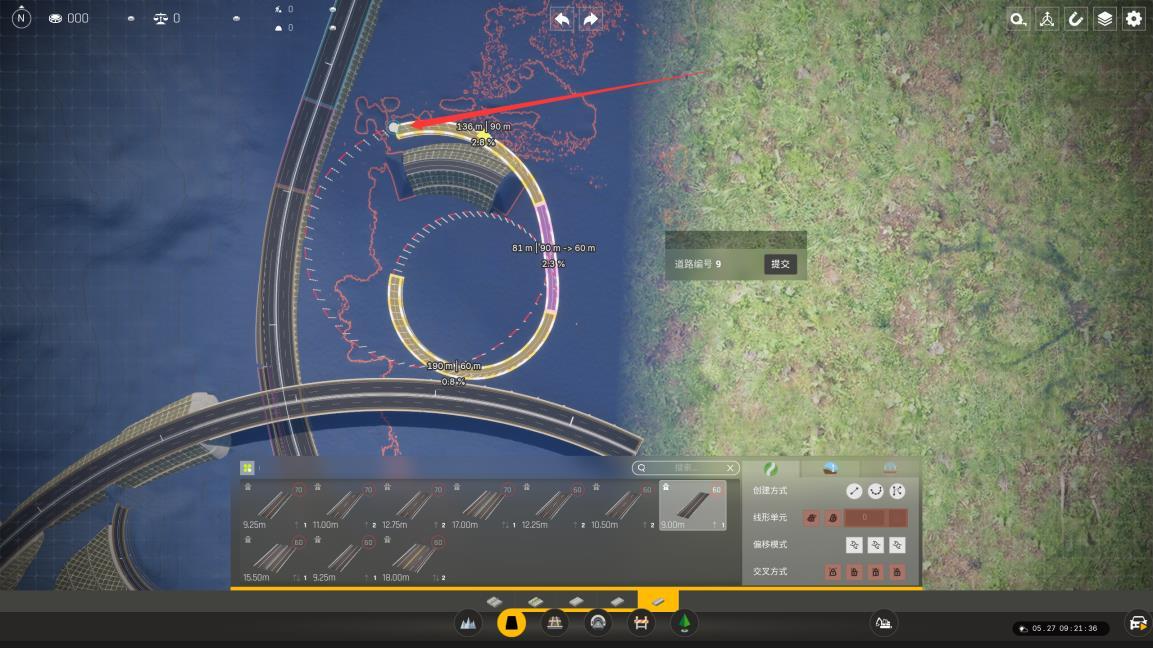
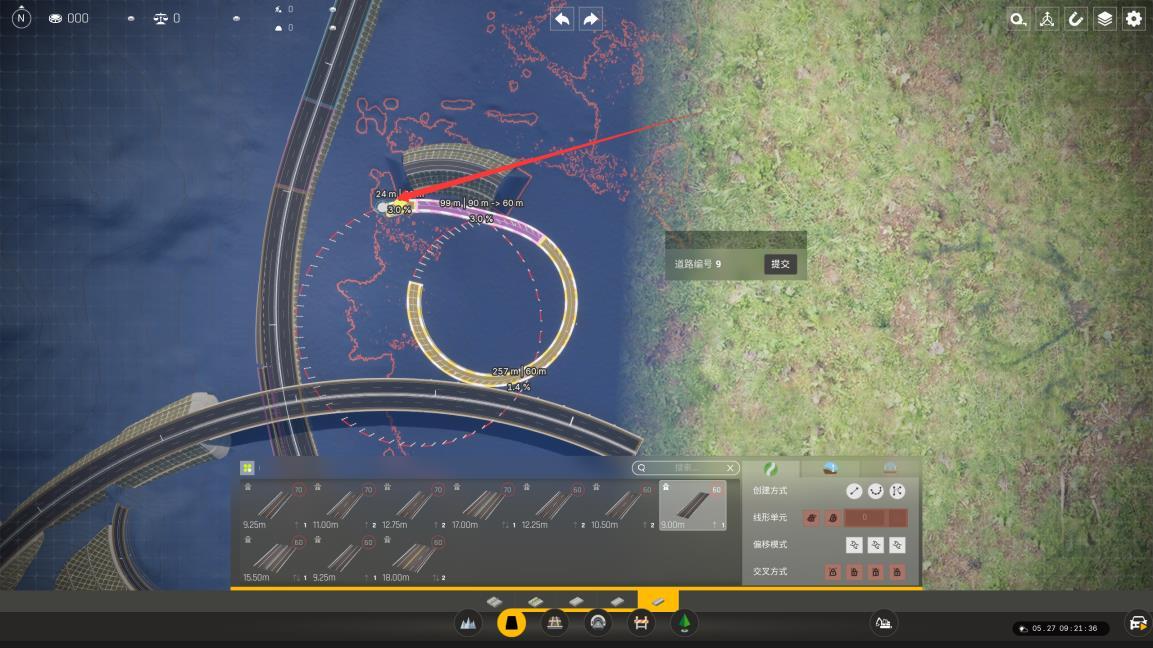
Step 4.1: Drag and refine after connection. After the large arc connects to the small arc, continue adjusting control points so the ramp has enough angle and distance to join the mainline.
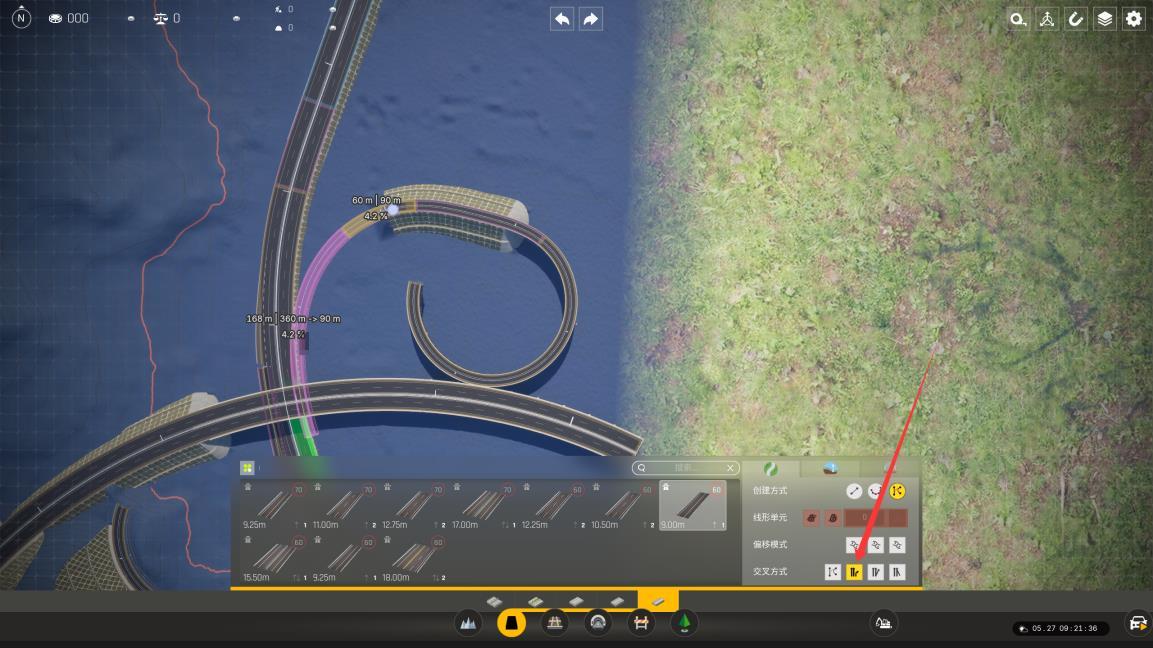
Step 5: Tie the ramp into the mainline. Once the ovoid body is smooth, use the ramp-to-mainline connection workflow to connect the small arc or the following connection segment into the target mainline entrance.
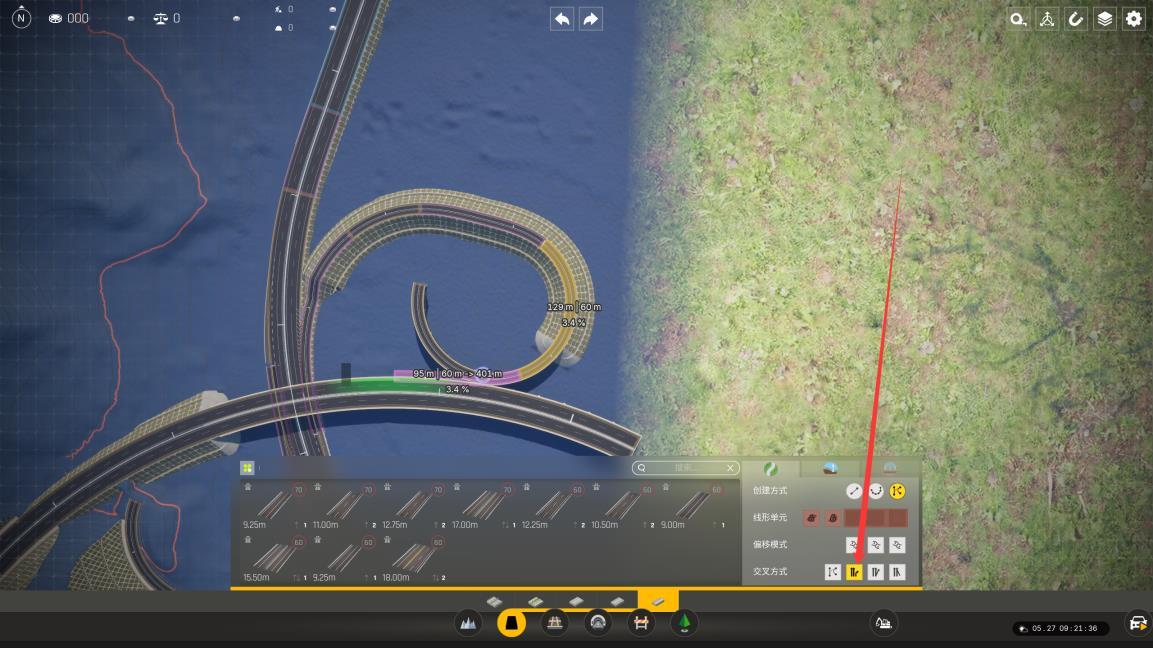
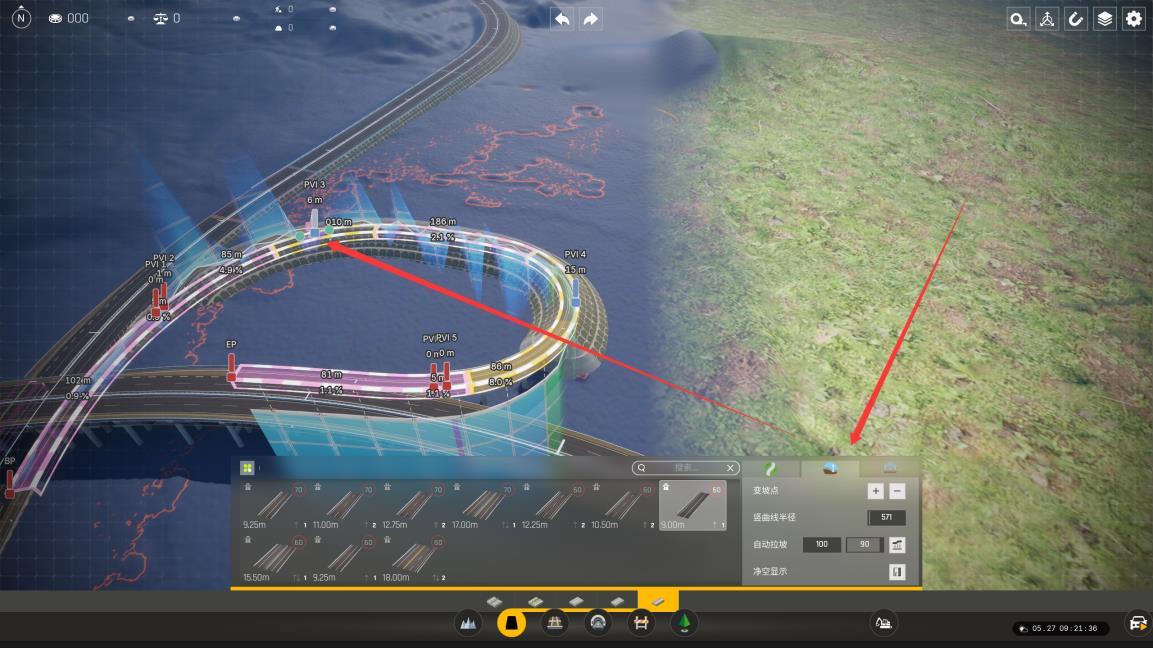
Step 6: Adjust the vertical profile. After the horizontal alignment is complete, edit the grade so the ramp elevation fits the mainline entrance, terrain, bridges, tunnels, and drainage.
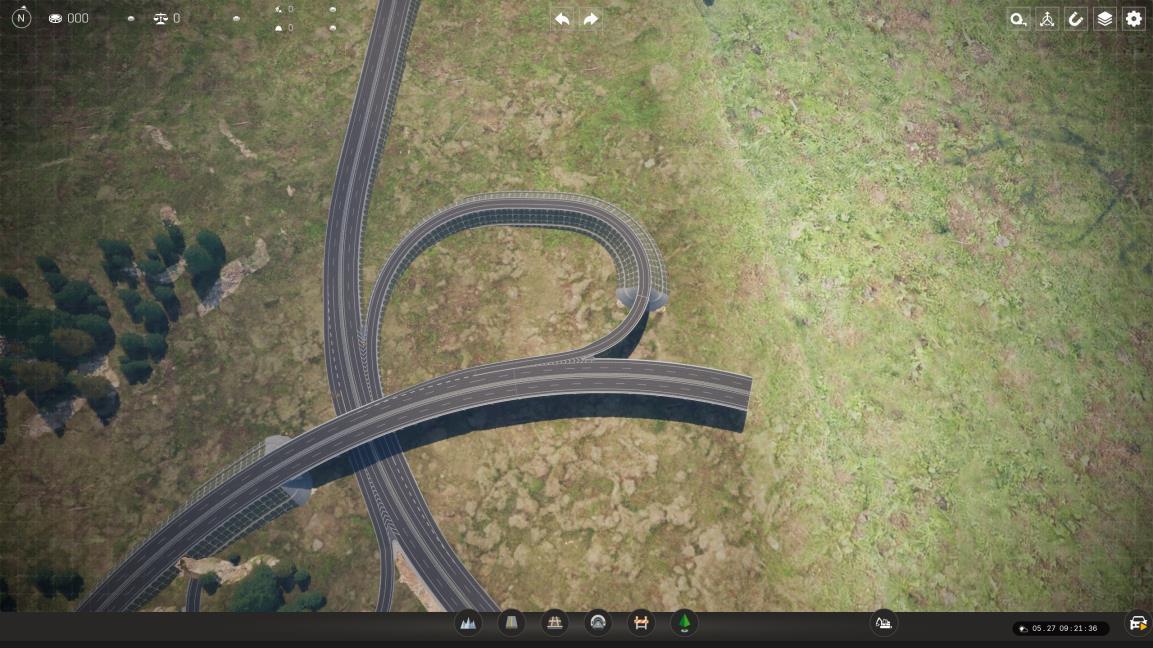
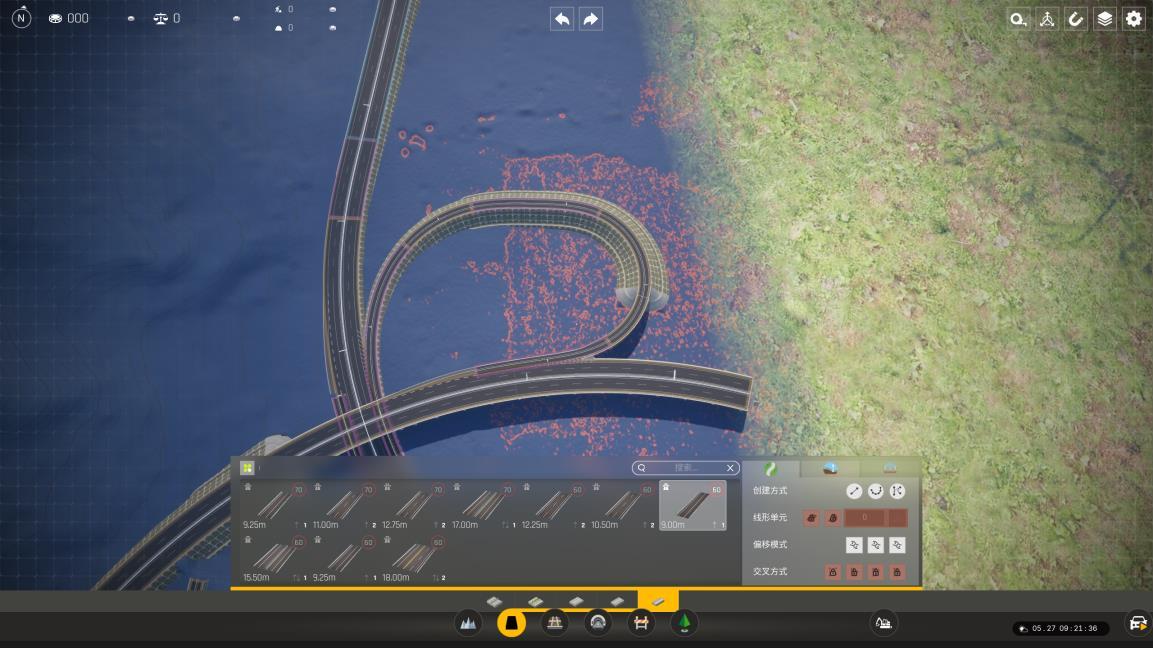
Step 7: Check the final result. From the top view, confirm that the ramp forms a smooth ovoid curve and that vehicles naturally move from the large arc into the small arc and then into the mainline entrance.
| Check | Good result | Adjust if |
|---|---|---|
| Same direction | Both arcs turn left or both turn right. | One arc turns left and the other turns right; that is an S curve, not an ovoid curve. |
| Separation | Arcs and mainlines remain separated with a clear connection direction. | Arcs intersect, overlap, or leave no stable transition space. |
| Arc length | Enough circular-arc length remains after the transition consumes part of it. | The transition eats most of the arc or makes the circular section disappear. |
| Curvature | Curvature changes smoothly from 1/90 to 1/60. | The curvature plot jumps or the steering suddenly tightens. |
| Mainline entry | The ramp endpoint meets the mainline entrance naturally. | The connection angle is too hard, too short, or conflicts with the mainline. |